6/6/15

Wedding Cake with Burlap and Gerber Daisies

 can't tell you how happy I was to make this cake, how happy I am that these two people found each other and have begun their life together. The bride, like a sister to me and dear to my heart, gave me few instructions, just burlap, gerber daisies and she pinned a few pics on Pinterest. Love her confidence that I'd make something she'd love. 


If you're interested in knowing how this cake came together, see the photos below. Keep in mind this is how I do it, but there are a few ways to put a big cake together.

1. Bottom tier is 3 14" layers (vanilla and chocolate marble cake). Filling is vanilla creme. Below, it is stacked, filled and crumb coated with buttercream icing.


2. Big cakes are heavy and need dowels. I used 4 wooden dowels cut to size for support and 1 for the center, which helps keep the tiers from sliding.


3. Next I added a 10" cardboard cake round, for the next tier which is, coincidentally 2 layers of 10" marble cake. 

4. Some people put their tiers together and then set them on the cake. I prefer to assemble them on the cake: bottom layer, icing "dam," filling, then next layer, and a crumb coating of buttercream.


5. I chose to use shake straws as support, 4 of them cut to size. They are strong enough to hold the 6" tier. Then I added a 6" cardboard cake round.


6. Add the 6" layer and follow the same steps as #4 above.


7. Next step was to frost the whole thing with buttercream.


8. Then I just smoothed it( I use the viva towel method, google it if you're curious) and decorated as below. I used the cornelli lace and dot techniques, burlap ribbon and live gerber daisies (complements of the bride). VOILA!


Dr Seuss-Inspired Cat in a Graduation Hat Cake

Unique hat for a unique graduate! She requested a funky, pink cake, with a cat theme,ha ha, and this was my interpretation. 😉
Marbled vanilla and chocolate cake with vanilla creme filling, buttercream icing and marshmallow fondant accents.


Rio 2 Birthday Cake

Bright colors, big flowers, fun little birds…combined to make a festive cake for a friends daughter who was turning 11. Vanilla cake and vanilla creme filling, with buttercream icing and hand formed/hand cut fondant accents.


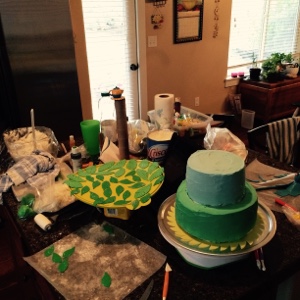
This is how this cake came together … so to speak.


5/25/15

Baseball Jersey Graduation Cake


Pretty straight forward cake: baseball jersey for the graduating high schooler. :-) Jersey is marshmallow fondant, all hand pieced (11/2 hours work), as is the graduate cap. The cake itself was BIG, bigger than it looks here. 11"x15", 3 layers, and each layer is a cake and a third, so the equivalent of 4 9" 2 layer cakes.
It's vanilla cake, with chocolate marbling, raspberry filling and buttercream icing.


Graduation Fondant Figure

A friend of ours asked me to make just the topper for her sons graduation cake. I love to make them, so it was easy to agree. Harder was carving out time to actually do it, ha ha! They do take a couple of hours, but if you like to be creative, it's fun work. I followed mostly the steps that Wilton publishes online to make graduation figures. You can find it here: http://www.wilton.com/3D/ideas/idea.cfm?alias=Graduate-Boy&cmp=pint2013&icid=04173dgraduateboy

I use rice krispy treat as a base, because it's lighter and doesn't require the drying time that fondant does, to stand up straight. Below are the steps I took:

Make a cone with rice krispy treat.

Cut a skewer to size, to hold the figures head on.


Next, I covered it with black buttercream icing.


While that set up a little, I started on the head, so it would have time to dry a little (and not lose its shape) before attaching.
And added the cap base too …
Then I set the head aside to dry.

Next, I rolled out a rectangle of marshmallow fondant for the gown and attached it.


Added some shoes.
And a neck:


And then made the arms:
I attached those with a little water, and added the diploma, then hands, and also a book (the Bible, in this case, as Brady is headed into the mission field).


Time to finish the head, by adding hair, glasses, a cap and tassel.
He was "off kilter " at first, so I adjusted his head and "set him straight," lol. I know, my husband doesn't think I'm funny either, but I totally crack MYSELF up! :-D


Tada! And that's all there was too it. I thought he turned out adorable!